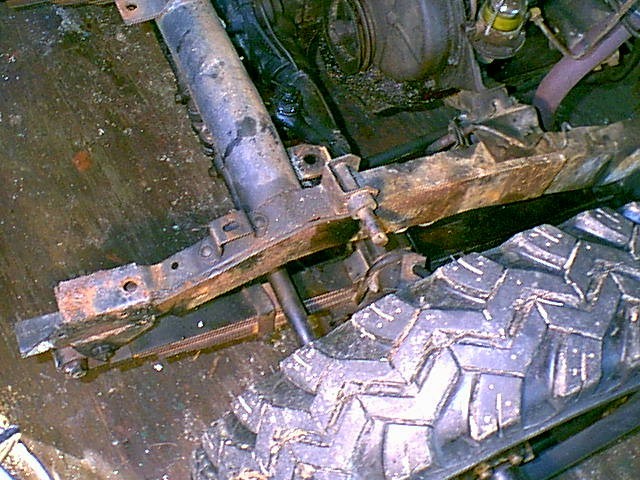
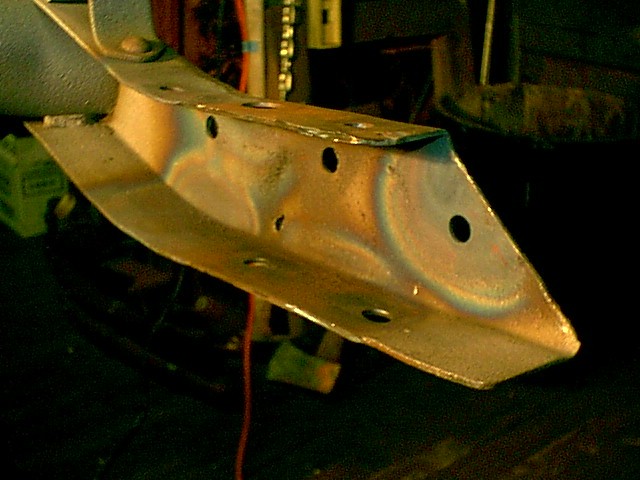
Examine the existing frame horn
It seems that the front bumper
gussets
are probably the most commonly damaged parts of a W.W.II jeep's
frame.
Replacing them properly is a critical step in many people's restoration
sequence. There is more than one method to do this, but I have
outlined
below the typical steps taken by me in my current restoration.
You
may use these steps as a guideline and adapt the techniques to your
particular
frame. If you notice errors or improvements to the process I
would
appreciate your input by email.
Thanks - Ren Bernier
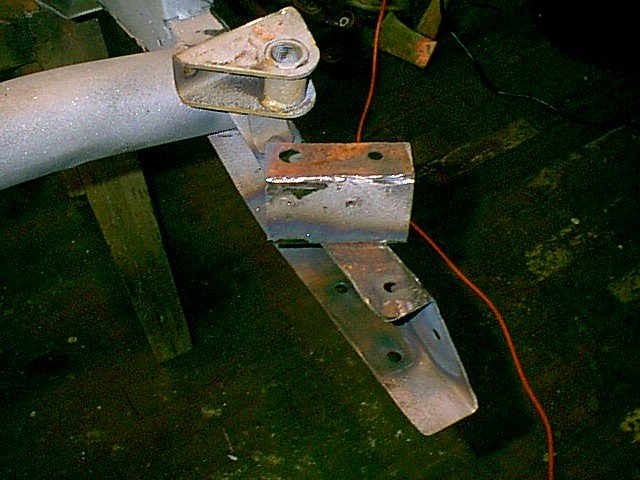
Step One - Evaluate the Damage
Examine the existing frame horn
Step Two - Remove Extraneous Pieces that are
Welded
to the Frame Horn
Using a grinder, cut-off wheel
and / or cutting torch, carefully remove and non-original metal
pieces.
Then sandblast the area to afford a careful inspection for cracks, etc.
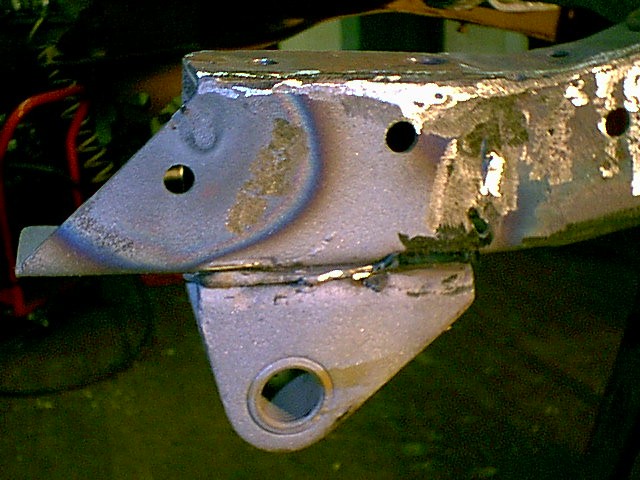
Step Three - Straighten Frame Horn as Needed
Step Four - Remove Remnants of old gussets and
the
Spring Shackle Hanger
The lower gusset is sandwiched between the spring shackle hanger and the frame. It is both riveted and welded in place. Using a cutoff wheel and grinder, carefully grind off the weld beads that attach the spring shackle hanger to the gusset and the gusset to the frame. Use care to not damage the frame channel or the spring shackle hanger when grinding.
Step Four - Remove Rivet Heads
Removal of the rivet heads can be done by grinding them off flush if you have access to them. they can also be center-punched and drilled out. Alternatively, the heads can be burned-off with a cutting torch, although this method runs the risk of damaging the frame channel or spring shackle hanger. I remove the upper rivet head only at this point.
Step Five - Pry the Spring Shackle Hanger and Old
Gusset
Off
I use old wood chisels as a prying
wedge to pull the old gusset and hanger down pulling the headless rivet
down through the frame channel.
Step Six- Remove the Inner Brace (from MB frames)
Again with careful grinding, I remove the welds that hold the inner frame brace to allow complete access to the frame channel. This brace is not present on GPWs.
Step Seven - Straighten and Repair the Frame
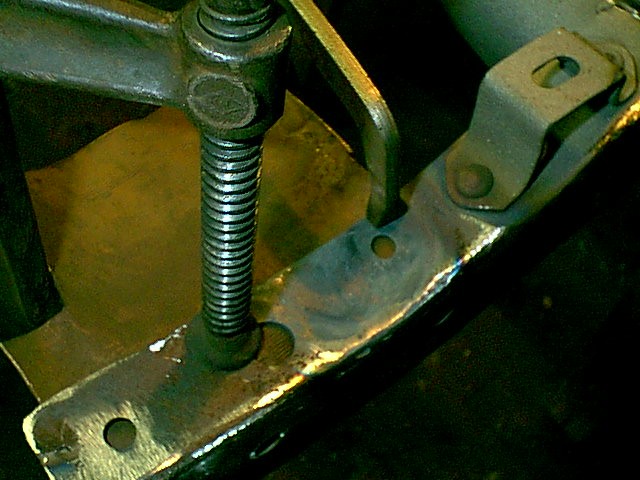
I use a torch, hammer and dolly to straighten the frame rails. Any holes that don't belong are also welded shut at this time. I use a copper backing plate behind holes when welding them shut as shown above.
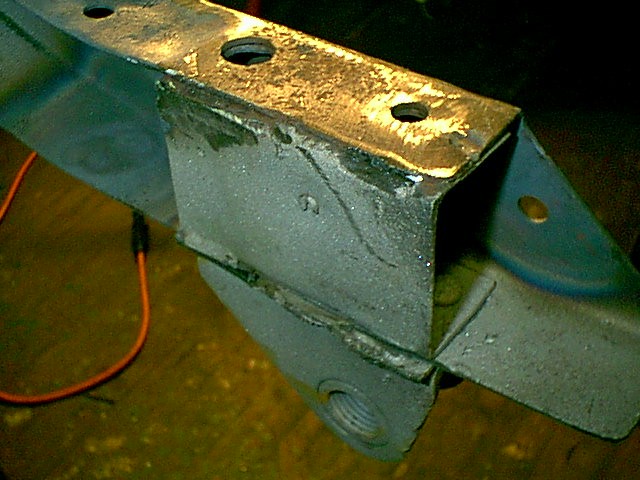
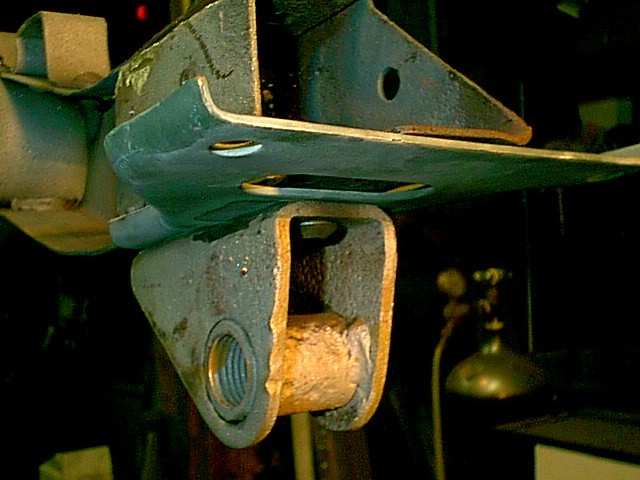
Step Eight- Prepare Spring Shackle Hanger
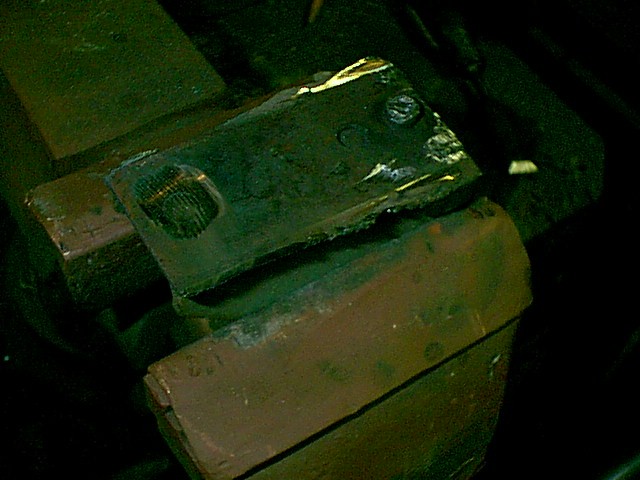
In a bench vice, grind off the stub of the rivet and drive the rivet down through the old gusset and spring shackle hanger.
Use the grinder to clean off any weld-bead debris from the spring shackle hanger.
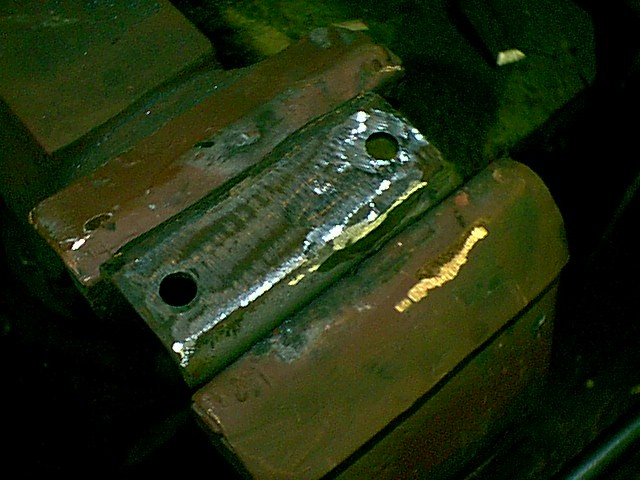
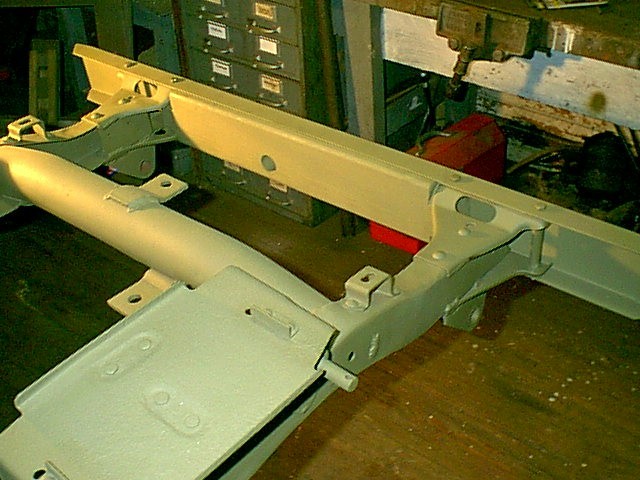
Ready for Reassembly!
Be sure that all the parts, the hanger, inner brace, and frame horn are straight and clean!
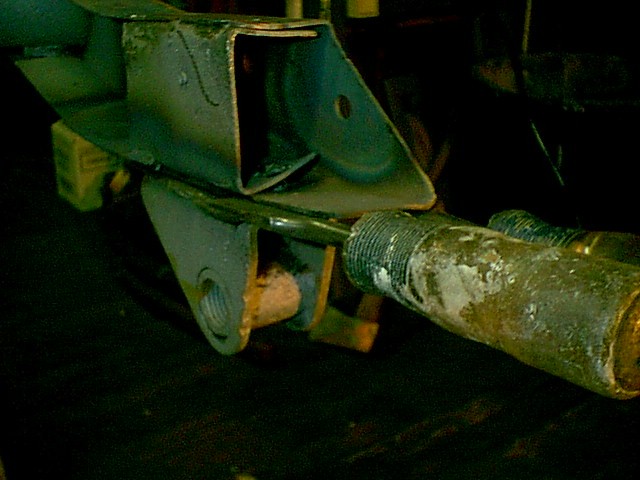
Step Nine - Reassembly of the Lower Gusset and Spring Shackle Hanger
I now use 3/8" X 1" long Button-head socket cap screws to reassemble the lower gusset and hanger assembly. These work nicely on an MB because the inner frame horn brace obscures the threaded end from view. The "button" end has an allen head socket in it that will be filled with weld and ground to shape to resemble the original rivet head.

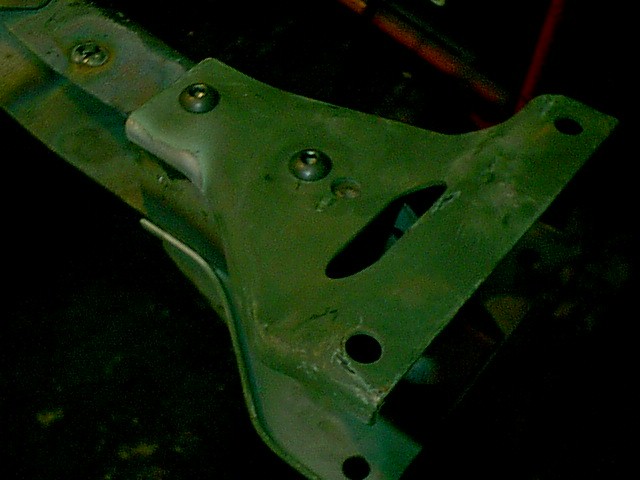
I normally tack-weld the nut to the end of the cap screw to secure it permanently later in the process (step fifteen). I also sandblast the spots shown (as visible above) where the gusset will be welded to the frame and the hanger. The repro gussets have a primer applied which must be removed for proper welding. Notice the orientation of the gusset. A gusset set contains four different gussets (top left, bottom left, top right, bottom right) Now is the time to double check that you have the correct ones in place! This is the bottom left gusset shown above.
Step Ten - Install upper gusset
I use 3/8" X 3/4" long button head socket cap screws
for
this step.
Step Eleven -Check gusset alignment and
install
spacer tubes
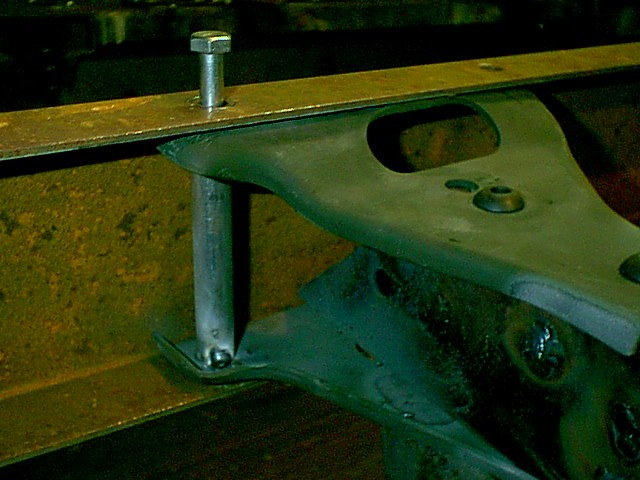
Using the bumper as a jig, I check the gusset alignment and then tighten the cap screws securely. I also install the spacer tubes on the outboard sides of the gussets as shown. The tubes are then tack-welded in place.
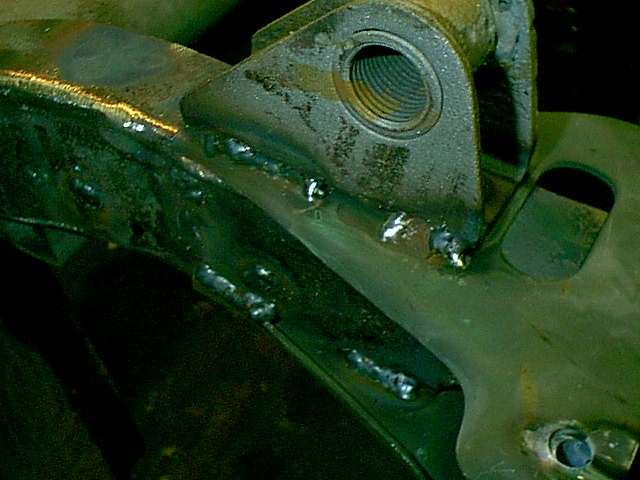
Step Twelve -Weld the lower gusset to the frame
With the frame upright, I weld the lower gussets to the frame on both sides as shown. Notice that I still have some repair weld-beads to grind-off. I should have done this grinding before this step! Oh, well...
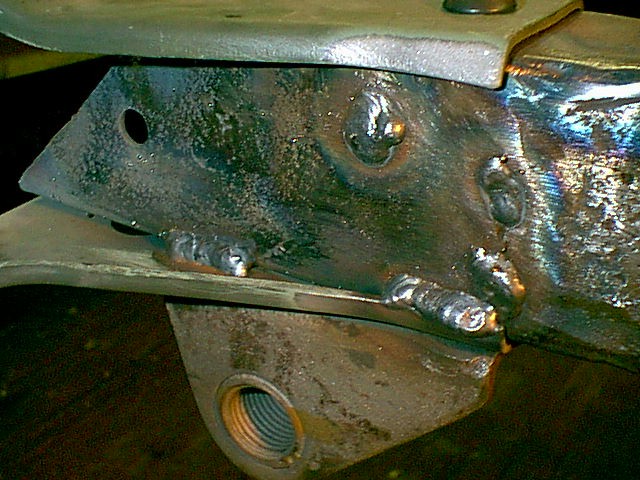
Step Thirteen -Weld the upper gusset and the spring shackle hanger
With the frame upside-down, I weld the upper gussets to the frame on both sides as shown. I also weld the spring shackle hangers to the frame and lower gusset.
Step Fourteen - Fill the lower button head socket cap screws with weld
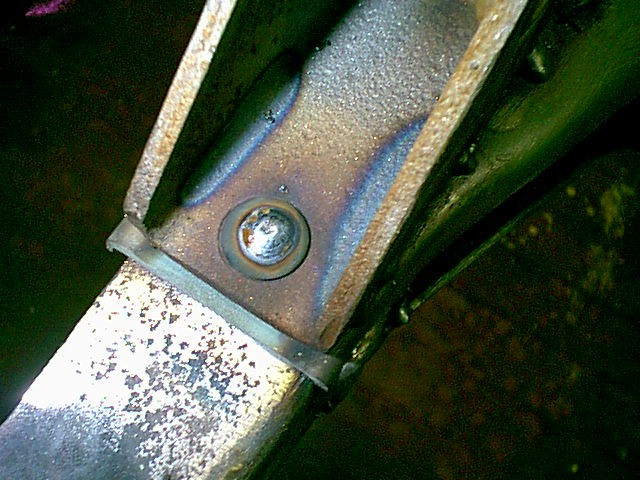
Before flipping the frame back over remember to fill the cap screws as shown.
Step Fifteen - Fill the upper button head socket cap screws with weld
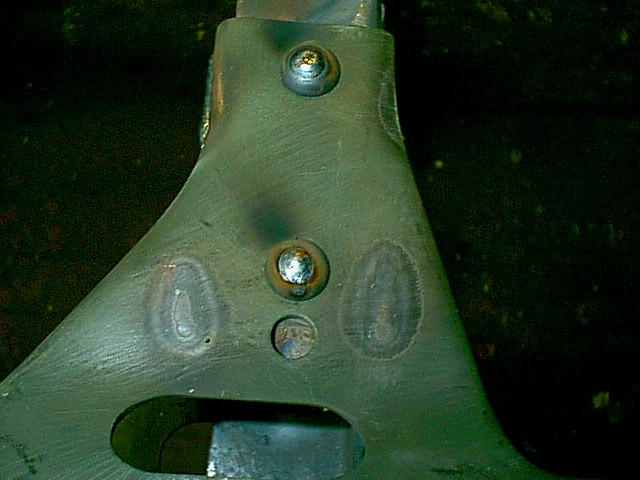
With the frame upright again, fill the upper button
head
socket cap screws with weld. If done carefully it will only
require
a small amount of hand-filing to make this look like a rivet
head.
At this point I also tack weld the nuts to the cap screws to make them
permanent.
Step Sixteen - Sand and prime

A little filing, sanding and primer completes the task.
Step Seventeen - Paint and Install Bumper and Filler
Now it all comes together! The bumper filler and bumper are installed after priming and painting the frame. This solid oak bumper filler is from Glen Klotz, in Texas. It fits beautifully and matches the original bumper filler specifications. It is tempting to varnish the beautiful piece of oak, but to maintain authenticity, O.D. paint should be applied as shown.
For more related images, go to the MB
Image Index and select "Phase 2: Repair and Reassembly of Chassis"
Good Luck!